Sanbase Alerts Use Cases - Whale Alert
Whale activity is a fascinating metric in the world of cryptocurrency. By closely monitoring the actions of major market players (which, depending on the asset, could be addresses worth $1M or more), you can gain insights to guide your own crypto strategy.
Many traders, understandably, are cautious about making decisions during volatile market periods. The risk of buying or selling at an inopportune time is significant: will the prices fall? Will they rebound?
At times, the market may appear calm, only for a whale to make a move and rapidly shift the landscape.
Consider the following example.
Between February and March 2021, we observed that whale activity (represented in pink and orange) for YFI often signaled price peaks (shown in green), which were invariably followed by substantial drops. However, starting from April, whale activity and price began to diverge.
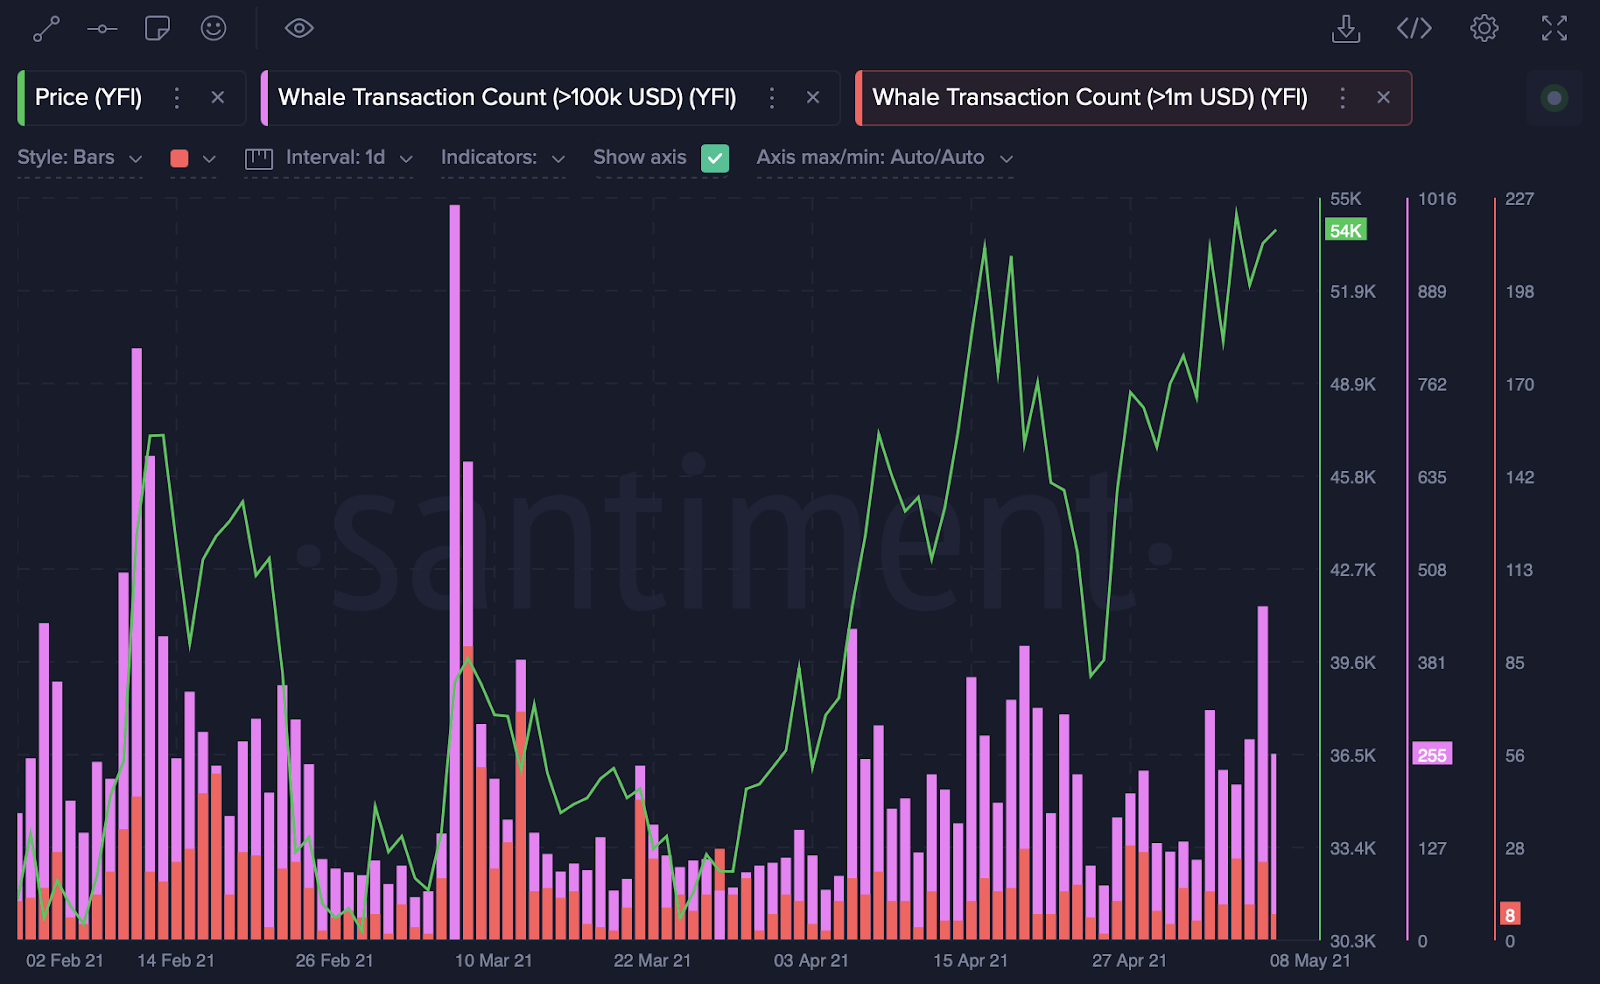
So, what happened next?
In May 2021, YFI's price seemed to be steadily increasing, while whale activity remained stable. Then, on May 8, we noticed a sudden surge in transactions, which coincided with another price peak, followed by a dramatic price drop.

How you choose to act on this information is entirely up to you. However, remember that knowledge is power, and timely knowledge is even more powerful.
Setting Up a Whale Transaction Alert
In this guide, we will walk you through the process of setting up a Whale Transaction Alert. We recommend starting with the most basic social trends alert. This alert will only be triggered if your specified keyword begins to rank among the top 10 trending social terms.
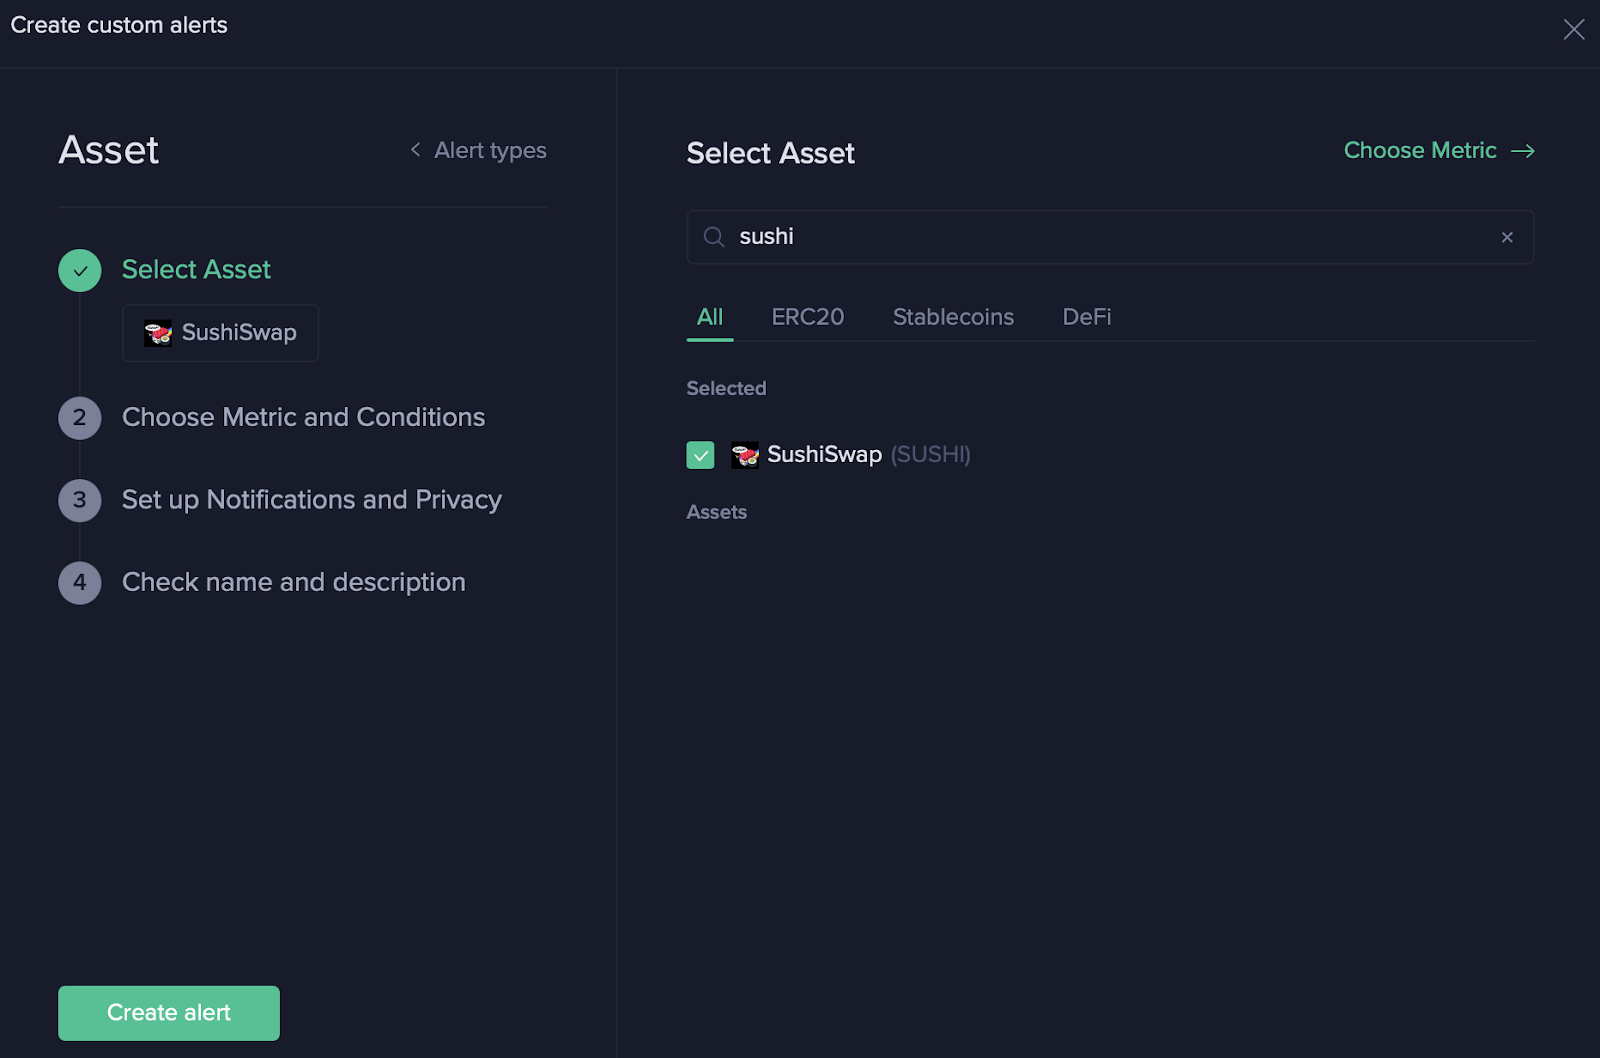
Step 1: Navigate to Alerts and Choose an Asset to Monitor
You can either select an asset you wish to monitor or use an asset from your existing watchlist.
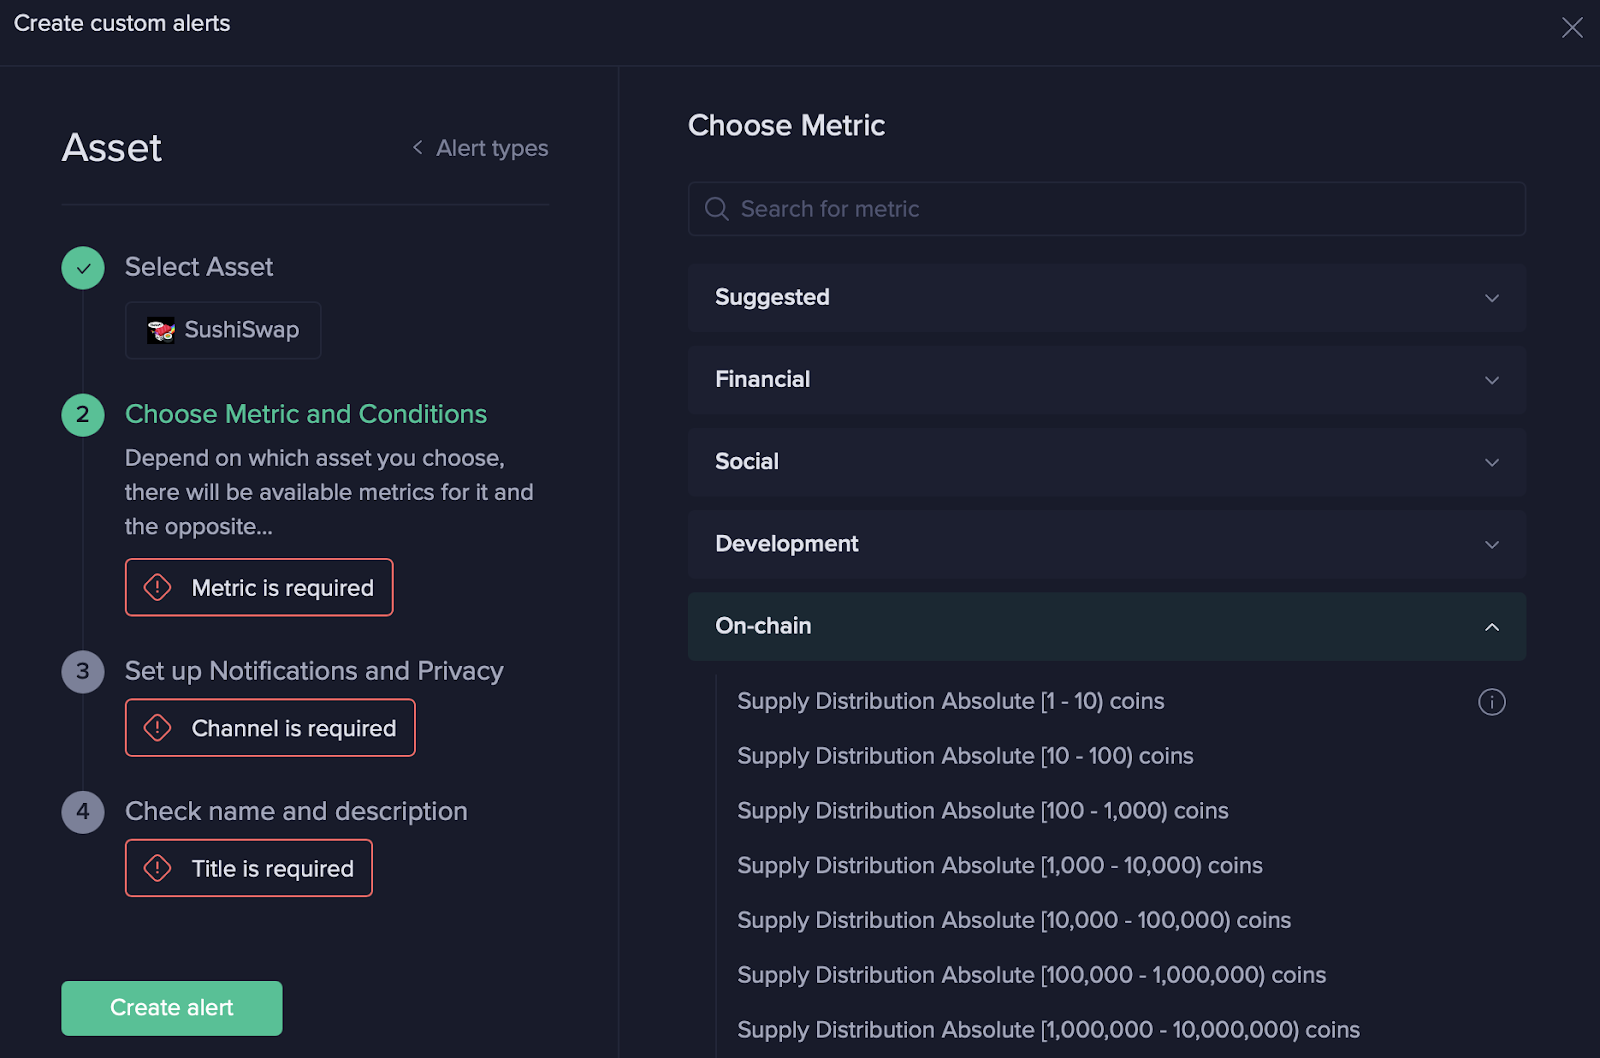
Step 2: Selecting Metrics
Navigate to the metrics section and choose your preferred 'Whale Transactions' from the On-Chain metrics set.
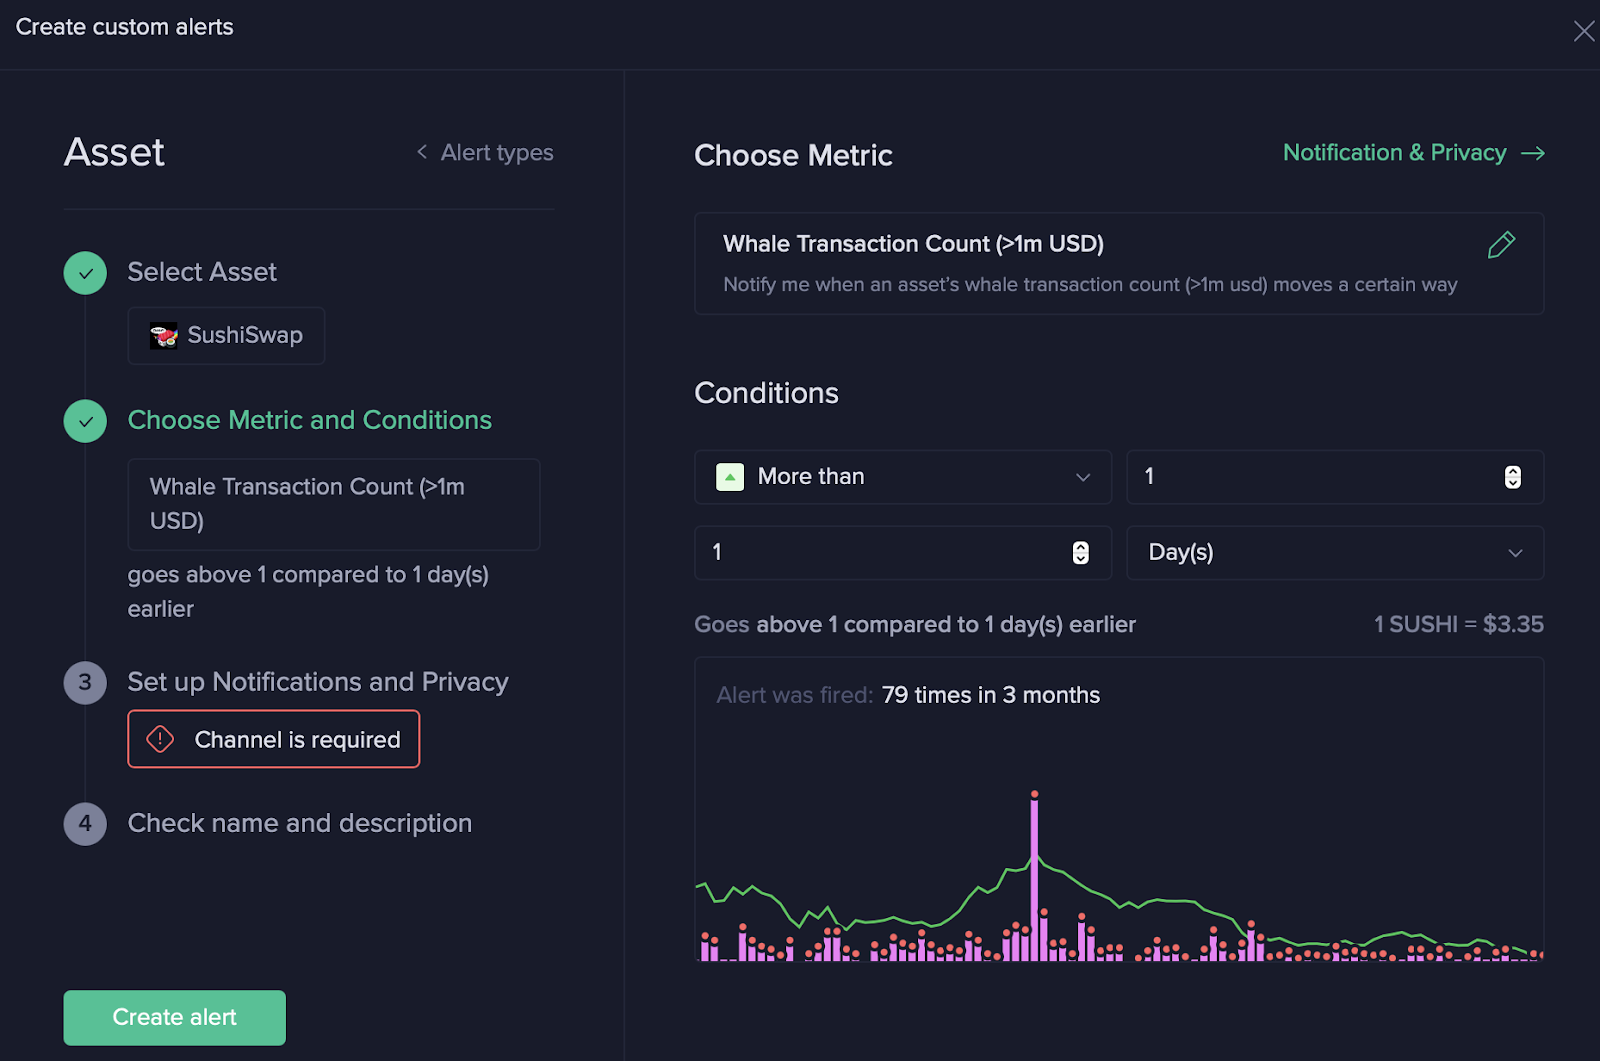
Examine the chart thoroughly. In this example, the alert would have been triggered 79 times over a three-month period, which could be considered excessive.
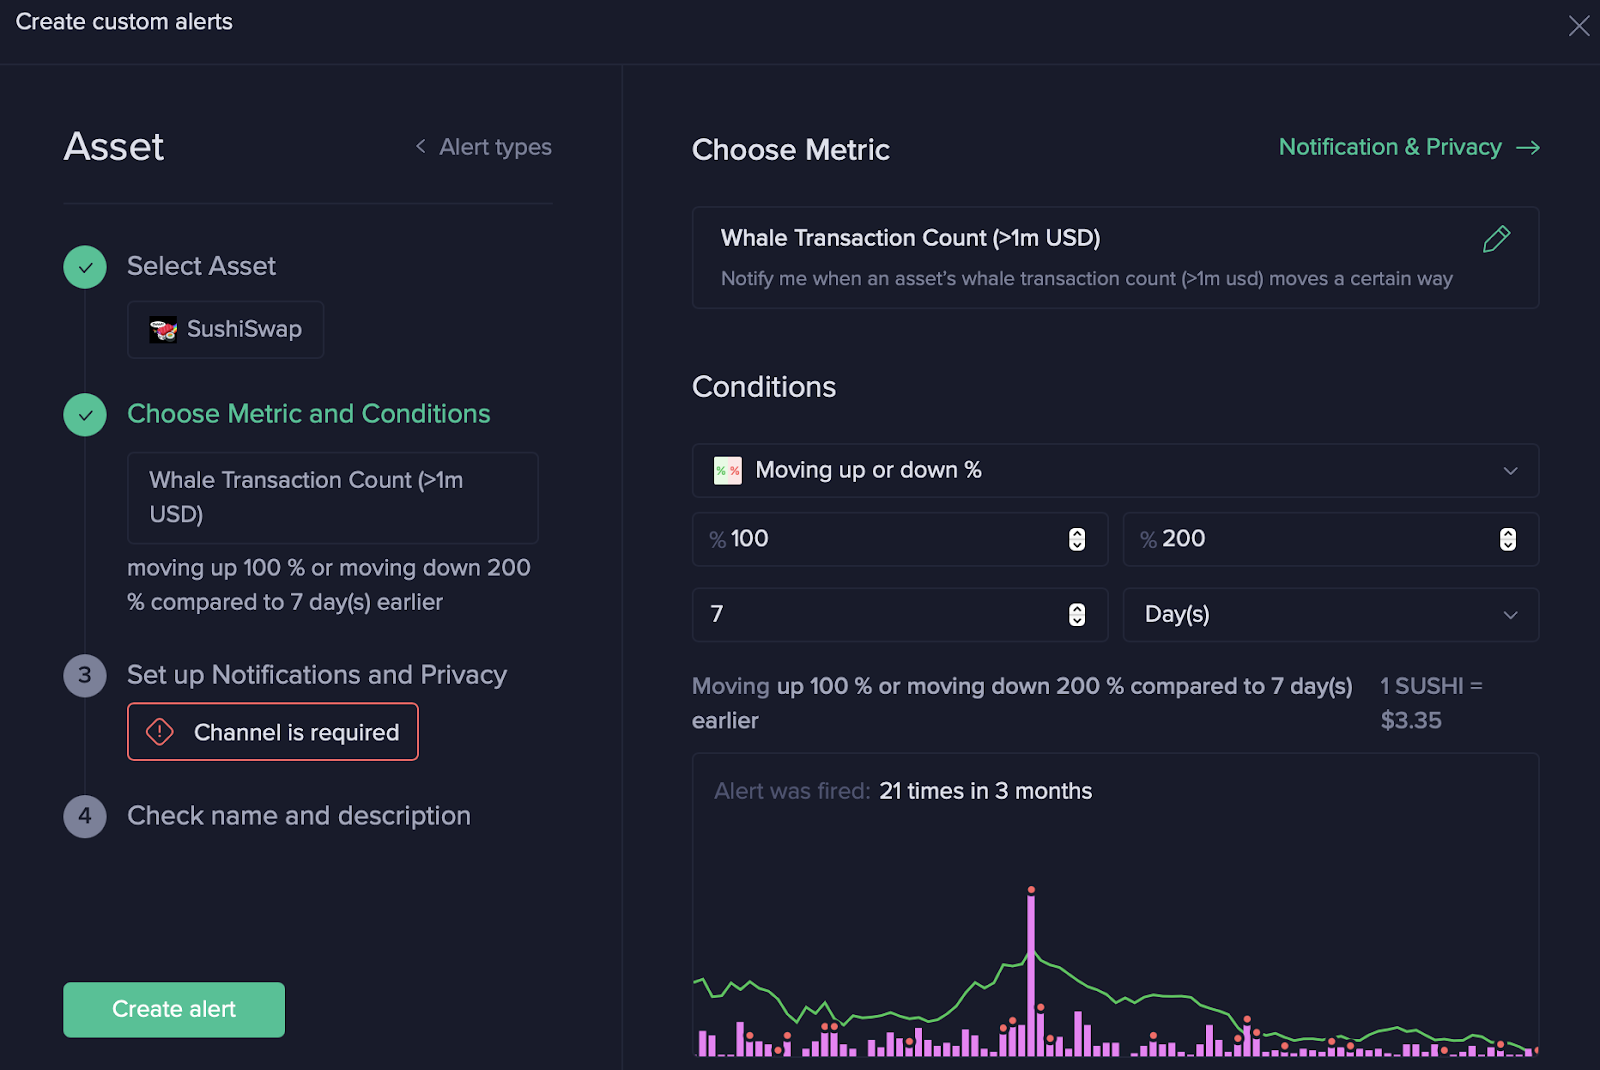
Step 3: Fine-Tune Your Conditions
Adjust your conditions until you're satisfied with the potential number of alerts. For example, you might want to switch to the percentage metric that moves up or down compared to the previous 7 days.
In the example below, we've adjusted the conditions to yield a total of 21 alerts over a 3-month period.
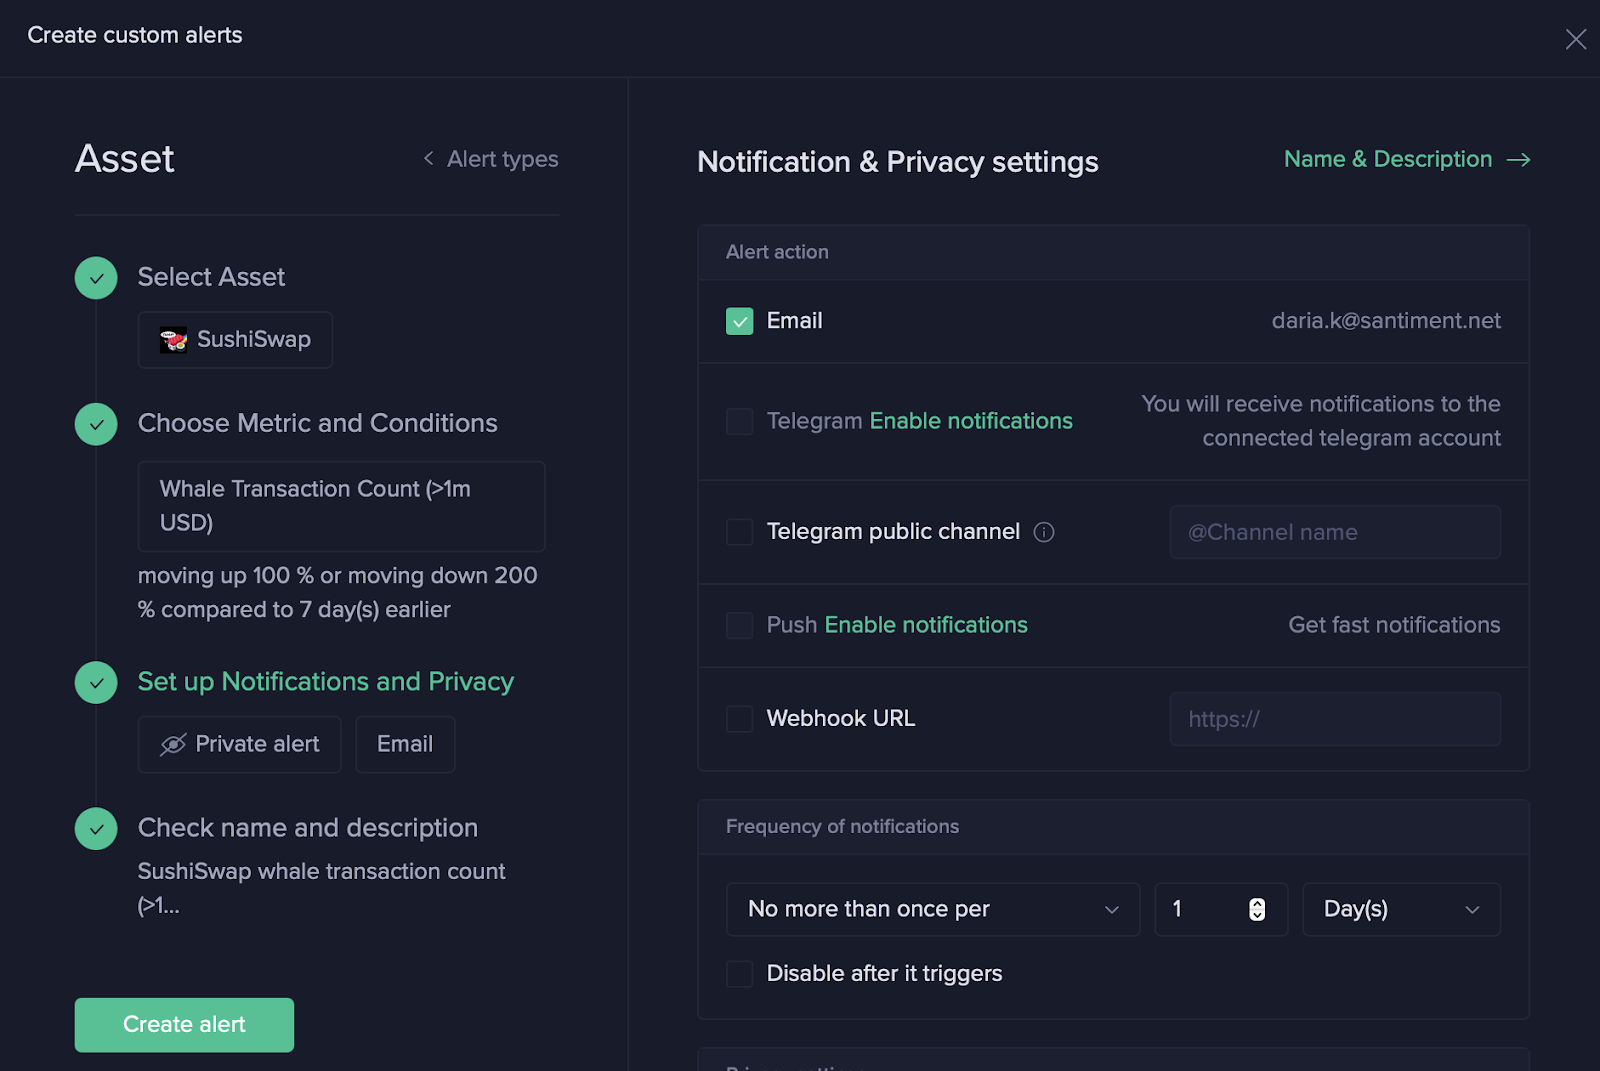
Step 4: Choose Your Preferred Notification Methods and Frequency
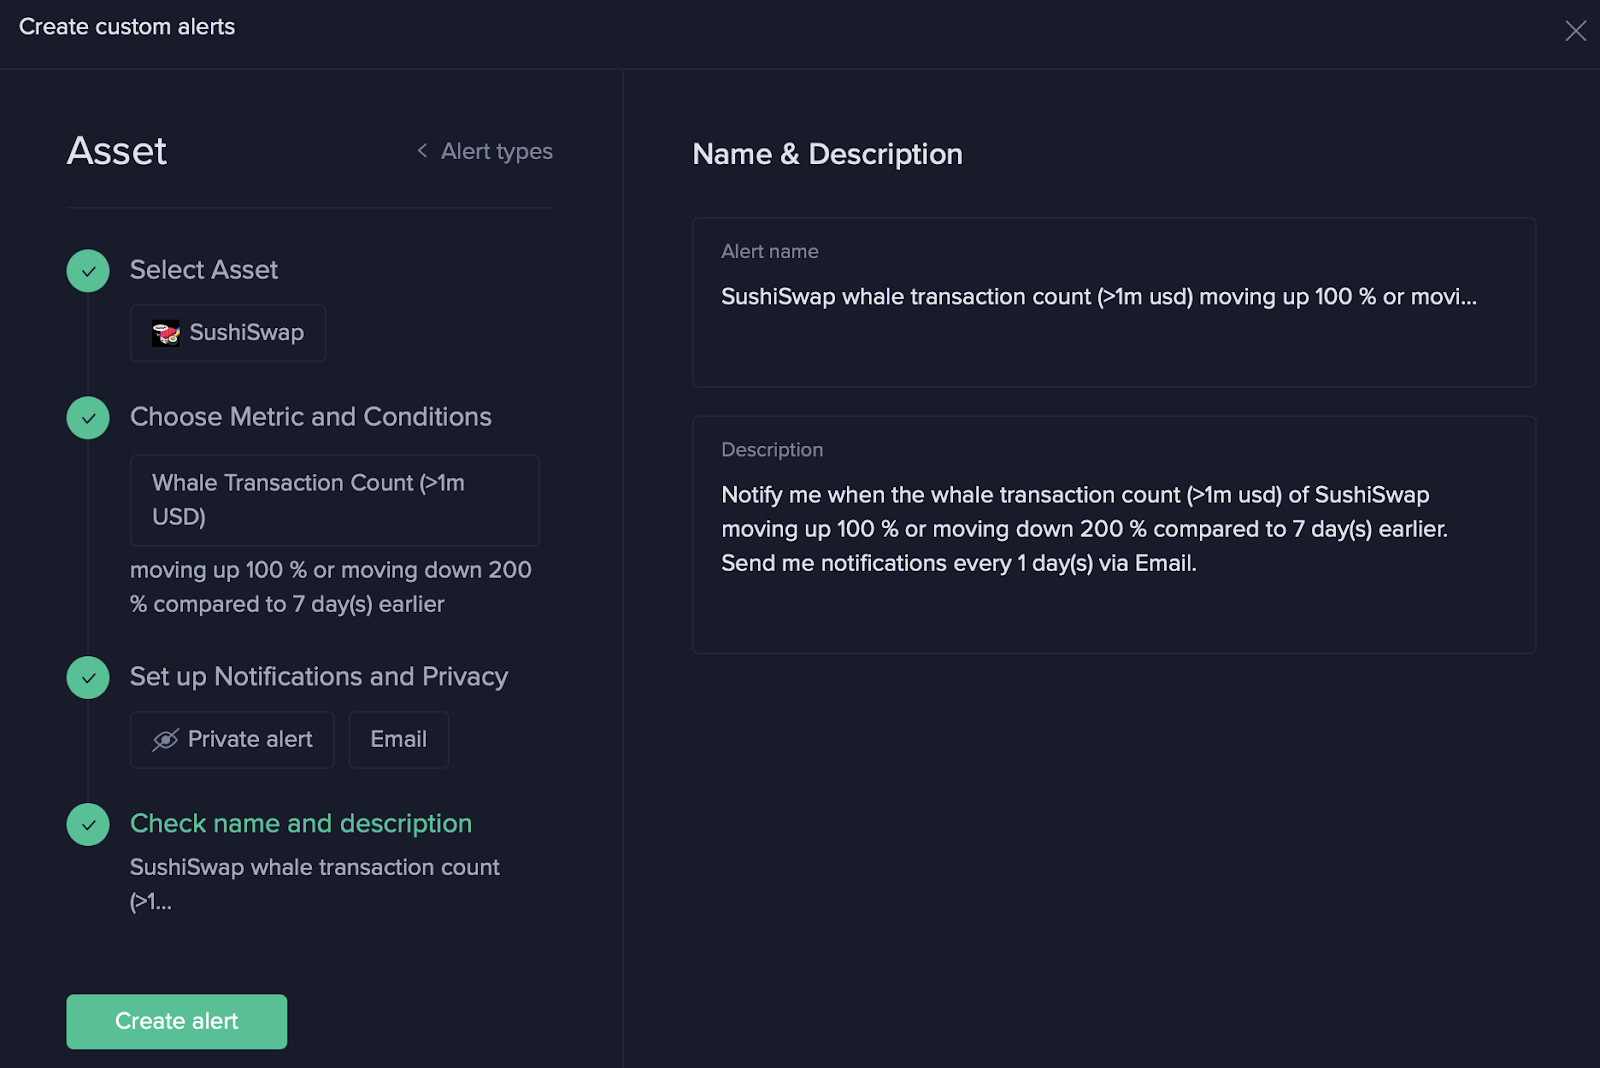
Step 5: Confirm Alert Name and Create Alert
Ensure you are satisfied with the name of your alert. Once confirmed, click on the 'Create Alert' button.
Congratulations, you have successfully created an alert!